With a scale of 1 to 20, this model is exploring its construction detail by casting one of the columns. The use of formwork to recess the concrete edges for the brick facade was investigated and demonstrated in this model. Also, the used of Red Grandis hardwood was chosen to represent the brick facade, in order to express the joints between the concrete column and the brick facade. Red Grandis hardwood is carefully and precisely crafted to suit the outline of the concrete column. With the utilization of laser cutting and digital file preparation for the formwork, the model is ensured to be accurate and reliable. Also, few details were considered for the models, such as the assembly of the model, sanding with 1500 grid sandpaper and the detail junction between each element, which enhances its quality and premium appearance.
Scale: 1:20
Material & Techniques:
Laser cutting - Formwork for base and column Concrete casting - Base and structural column
Timber working - Brick facade
Casting:
1. Preparation(3 hrs,$0)
The preparation for this project, I used SketchUp to digitalize the sequence of the process before I started my base. This demonstrates the construction sequence for the mould for casting. The whole exercise of preparation makes the process clear in my head.
3D Sketchup Model for review
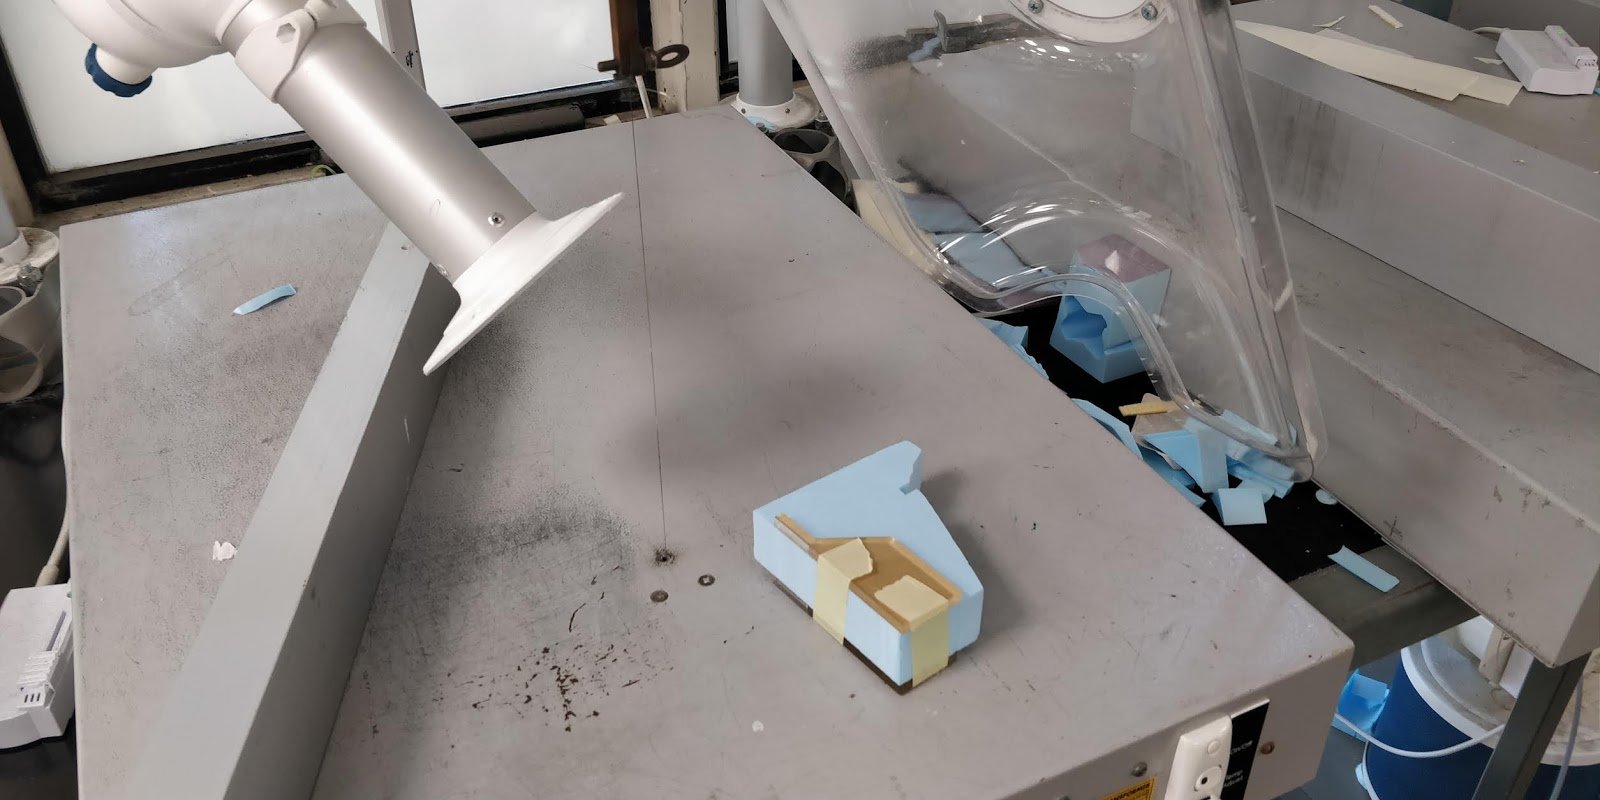
Step 1: Prepare base and cut blue foam into the right shape
Step 2: Install blue foam into the base an insert the acrylic strip for offsetting the concrete edge
Step 3: casting to the right height(30mm thick)
2. Mould construction and Casting(3 hrs,$15 laser cutting)
1. Laser-cut the profile of the shape, then use the profile the guide the hot wire would help the accuracy of the cutting.
Using the hotwire to trim off the side and the acrylic for guiding the hot wire.
Tips: Provide 6mm acrylic profile will help the cutting process easier and accurate
2. Laser-cut the 6mm acrylic piece and glue onto the blue foam for the recess of the concrete edge.
3. Assembly the blue-foam and the acrylic piece in the formwork. The edge was built out the spare piece of red acrylic from the last project, in order to save cost. Additionally, the use of 2mm plywood under the formwork to create a slight angle for the concrete column.
Formwork completion
Formwork completion
4. Casting steps illustrated below(10 hrs,$20 Hydrostone): Prior to making the hydrostone mixture, the volume of the mould is around 0.5 L. With the ratio of 1:3 in weight, 865 grams of hydrostone powder and 292 grams of water is measured for the mixture. Additionally, 7 grams of oxide is used in this mixture for a light grey color, in order to mimic the colour of concrete. Finally, wearing gloves and goggles for safety protection is necessary for this project.
Measure 865 grams of hydrostone power in a plastic bowl
Measure 292 grams of water in a plastic bowl
Step 1: Measure 7gram of oxide for the hydrostone mixture.
5. Once everything is ready, the first step is to dilute the oxide in the water. After that, slowly add the hydrostone powder into the water. Do not put water into the powder, as it will create lots of clots and won't be mixed properly. Once the mixture is fully mixed, pull them into the mould with 4 sticks guiding the flow of the liquid. Finally, I vibrated the formwork for at least 5 mins, in order to eliminate the air bubbles inside. After 1 hrs, the mould can be stripped off.
CAD drawings with casting column
6. For the base construction, I used the same procedure to make the mould. I also put a 6mm acrylic block for the concrete to be recessed. So, the concrete column can lock down into the base.
Base mould 150mm by 150mm
Base mould 150mm by 150mm
Pouring the mixture and vibrate on the edge of the table.
Using a knife to trim off the edge of the base for a better edge protection
Sanding the block with some water and 800 grit sandpaper to make the surface smooth
7. In order to take out the acrylic block inside the concrete, I drilled a 3mm hole into the block, then placed a screw and used a hammar to take it out. It was not a good idea to place an acrylic at the bottom of the formwork, which can be stuck inside the concrete. A better solution for future project would be using a blue foam so that it can be easily taken out off the concrete base.
Drill 3mm hole into the block
Screw into the base
Use the hammer to take it out
Fit perfectly into the spot
Timber working:
1. Preparation(2 hrs,$0)
The preparation for this project, I used the cad file to drawing out the brickwork and translate the drawing on the timber block that I am going to work with.
Translating drawings onto the timber block
2. Construction(5 hrs,$5 timber block) Then I used the bandsaw to trim off the excessed material and follow the guideline I drew.
Bandsaw cutting on the timber block
3. The overall shape is achieved. Now, I translated the angle from the concrete beam onto the timber block, in order to work out the recessed area in the block. I used a metal ruler and a piece of timber to make sure they are on the same plane. With this method, I was able to get the exact angle from the concrete beam. (credit to Daniel for teaching me this method)
Align them with a piece of straight timber and measure the angle.
4. Chiselling
Firstly, I used a mini saw to divide the excessive material into cubes. This is because it will be hard to chisel out the entire section in one go. In this process, slow and patient is the key to success.
Cutting timber into small cubes
Secure the timber block in the clamp and used the mini-saw to trim off
I used too much force from the top left corner, the timber splits. The way to improve is that I should use the force against the timber grain. Otherwise, it will split all the time.
Trim off the straight edge
Use the chisel slowly take out the cube one by one
Clamp the timber block on the table and trim off the excessed material. During this time, make sure constantly checking the timber block with the concrete column for alignments.
Complete: Front
Completed: Back
5. Finishing
Finally, I oiled the timber with Tung oil for the final touch. It will have a better color for this model and shows contrast with the concrete column. Prior to this step, I sand the timber block with 800 and 1200 grit sandpaper for the smooth finishes.
Oiled timber on the left. Original timber on the right
Finishes with Tung Oil for the timber finishes.
Final completion
Conclusion:The combination of timber and concrete column resonate with each other very well. This project cost $40 in total and I spend 23 hours to complete this project, which was $20 below the budget. For this project, the improvement can be made for the future is to seal the concrete with some concrete sealer, which can elevate the concrete finishes into the next level.


Comments
Post a Comment